Customize Your eSignature Requests with Your Brand Identity

BoldSign provides branding features that enable users to customize the appearance of the email and signing pages, ensuring a branded experience for your signers throughout the signing process. In this blog, we’ll explore how you can infuse your brand into your eSignature experience with BoldSign.
With BoldSign, you can personalize the signing page, from name in email, and audit trail documents with your company logo, and other branding elements. This feature ensures consistency in your branding across all documents.
Brand creation -Gif
Setting Up Branding in BoldSign
This section will show you how to set up branding in BoldSign.
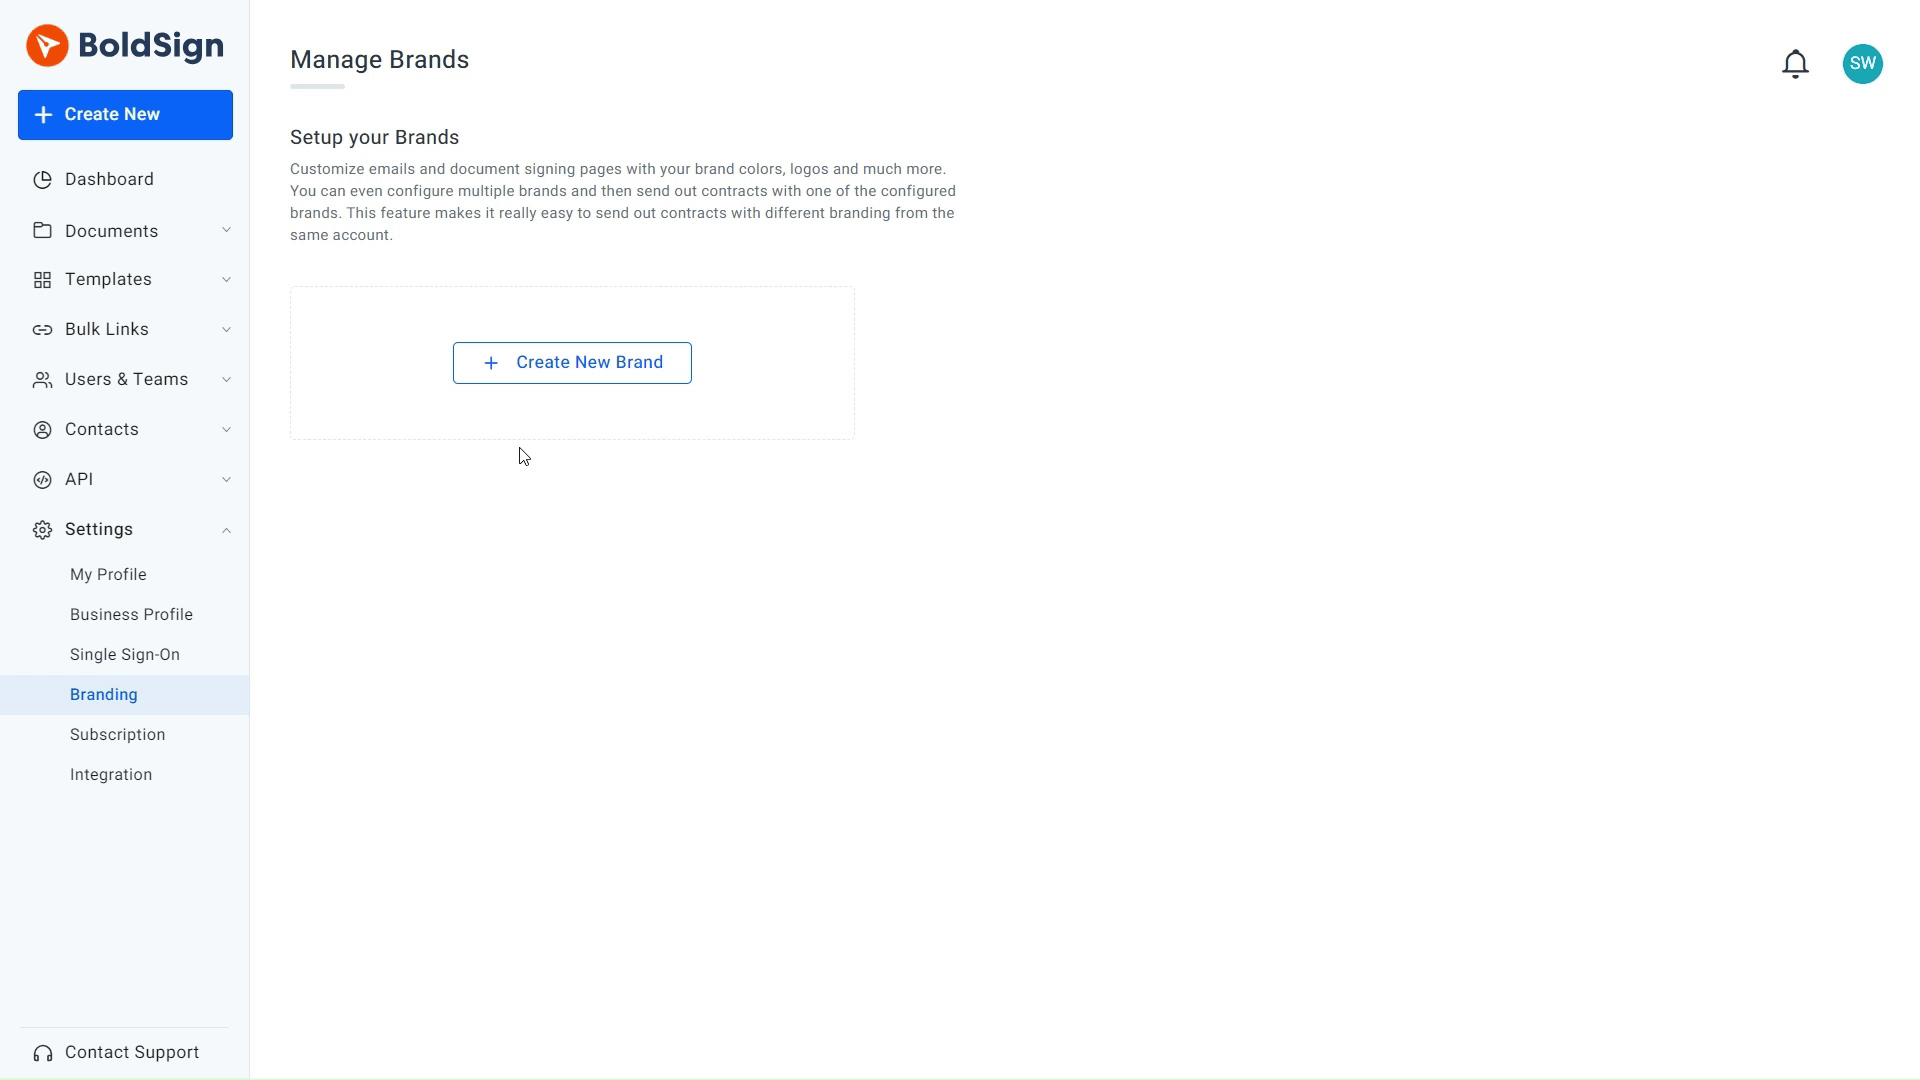
Create new brand page
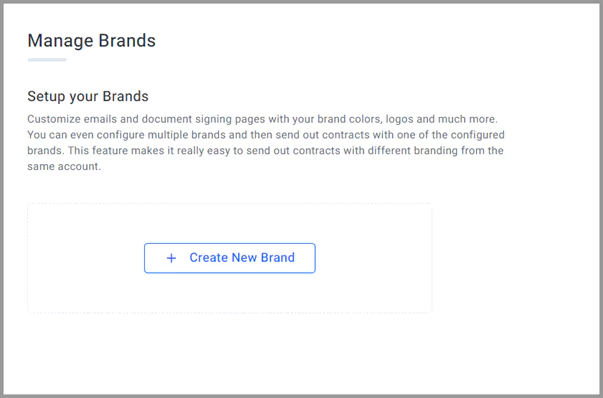
Adding brand name and logo
Begin by navigating to the Settings page and clicking the section labeled Branding. Click Create a New Brand. Input the brand name and upload your logo.
Adding brand name and logo
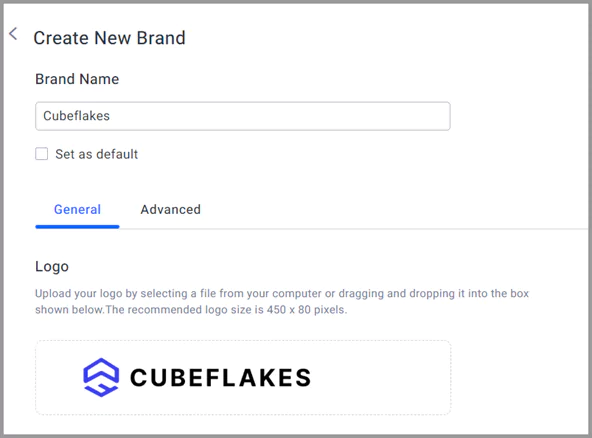
Customizing email display name and color scheme
For further customization, proceed to the Email & Signer Page customization section. You can add an email display name in the format {SenderName} via [company name], like in the following image. This email display name will only be visible on the signature request email.
Then, adjust the color scheme to match your branding, including the email background color, primary button color, and primary text color.
Customizing the email display name and colors
Hide BoldSign logo
You can enable the “BoldSign Branding” option to hide the ‘Powered by BoldSign’ logo in your emails.
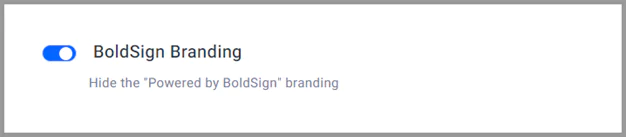
Hiding the powered by BoldSign branding option
Selecting the email delivery option for signed documents
Next, navigate to the advanced section. First, select how the final signed document is delivered to signers. This can either be as an attachment or a link.
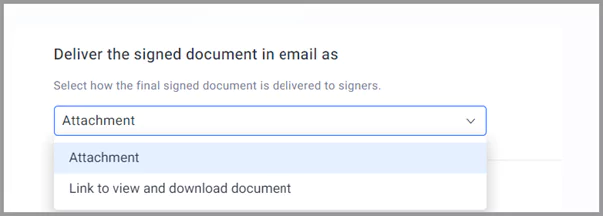
Signed document delivery mode
Combining audit trail with the signed document
Enabling this option helps merge signed documents with their respective audit trails, simplifying document management and ensuring comprehensive record-keeping.

Combine audit trail option
Adding custom legal terms
The next option is to add custom legal terms. These terms will be appended to the regular electronic terms and included in the audit trail document.
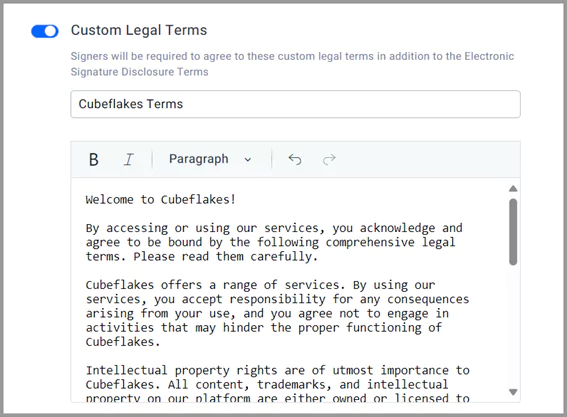
Option to add custom legal terms
Enabling and setting the document time zone
Scroll down to enable the time zone feature and set it according to your requirements. This selected time zone will be displayed in the audit trail document and the ‘Date Signed’ form field.
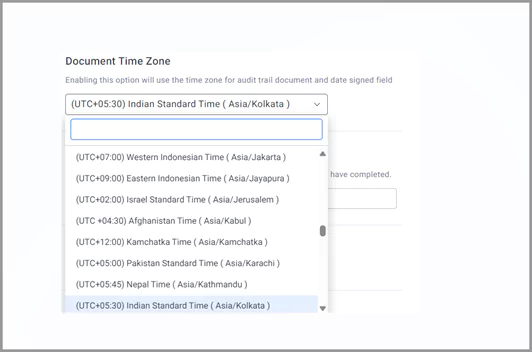
Setting the time zone
Adding redirect URL upon document completion
After setting the time zone, enable the ‘Redirect URL’ option and add the necessary URL. Once signers and reviewers complete the document, they will be automatically redirected to the specified URL for further action or information.
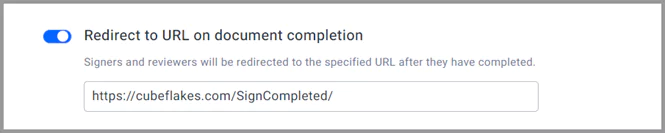
Adding the redirect URL
Hiding the decline and save options for signers
Enabling the hide option for saving and declining documents prevents signers from saving or declining the signing document enhancing security and ensuring completion of the signing process.
Once done, save the brand. With a paid plan, multiple brands can be created in BoldSign.
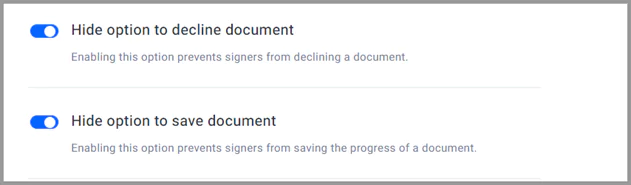
Hiding the decline and saving option for signers
Making a brand default
To designate a brand as the default after creation, click the context menu of the specific brand. There, you can select Set as Default Brand. Note that only one brand can be set as default at a time.
Deleting a brand
To permanently delete a brand, utilize the Delete option in the context menu.
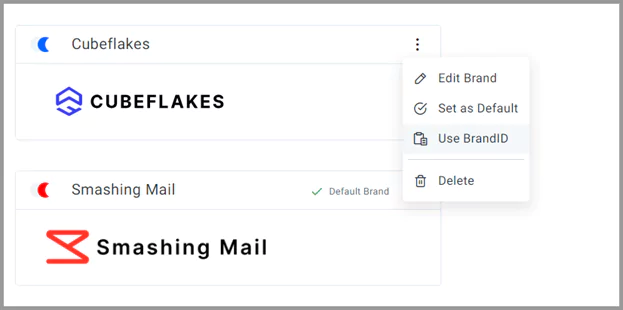
Context menu option for branding
Editing a brand
To change a created brand, click the context menu, and then Edit Brand. The saved brand information will be displayed. You can make your changes and save them.
Selecting a Brand for Signature Requests
After successfully creating and configuring a brand, remember to select the desired brand to be displayed on the email notifications, signing page, and other relevant areas when sending a signature request.
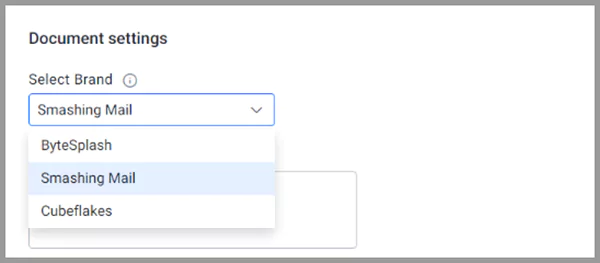
Selecting the brand
Email Page Experience
The signer can see the customized brand name, logo, and sender name on the email notifications page.
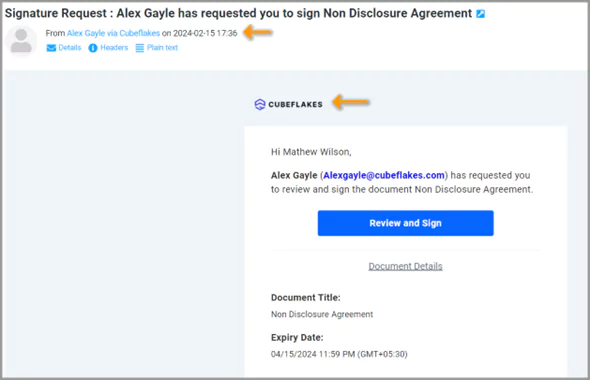
Email page setup
Signing Page Experience
On the signing page, it will first prompt us to confirm the legal terms provided, along with any custom terms added to the brand.
Then, the color scheme, brand name, and logo will be displayed on the signing page.
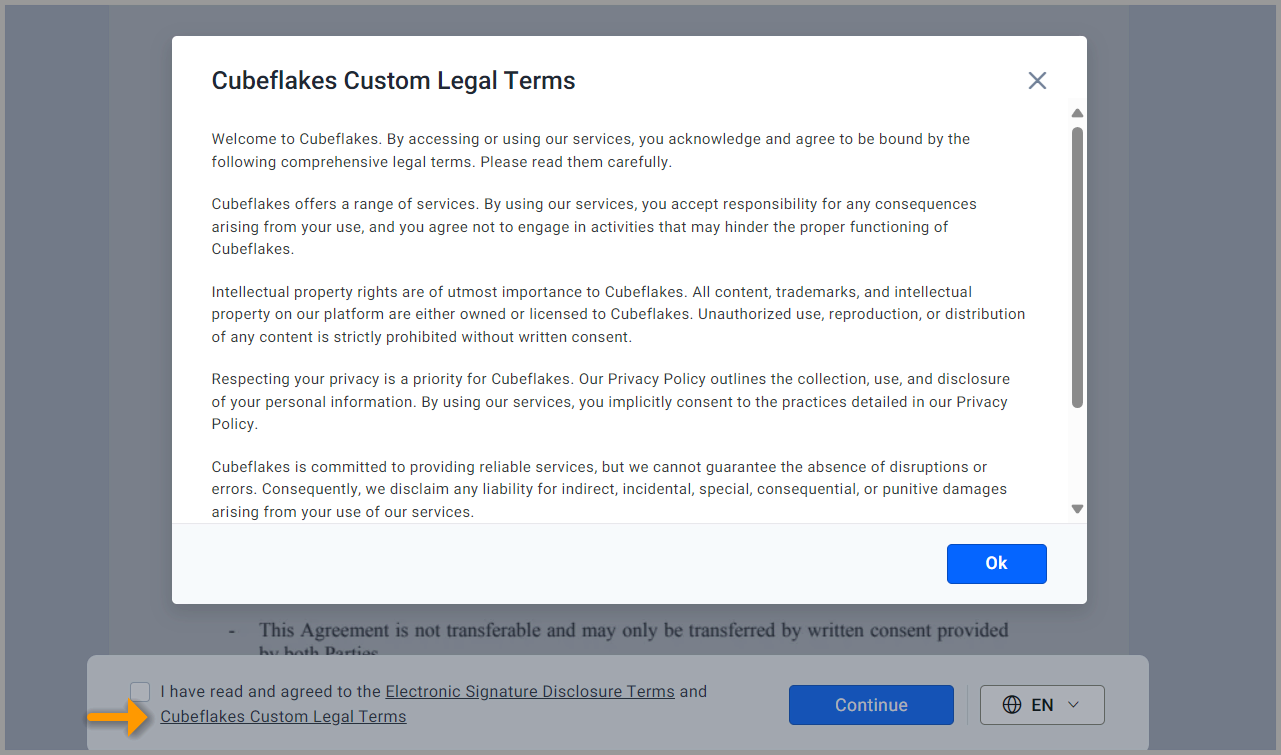
Custom legal terms shown in signer’s side
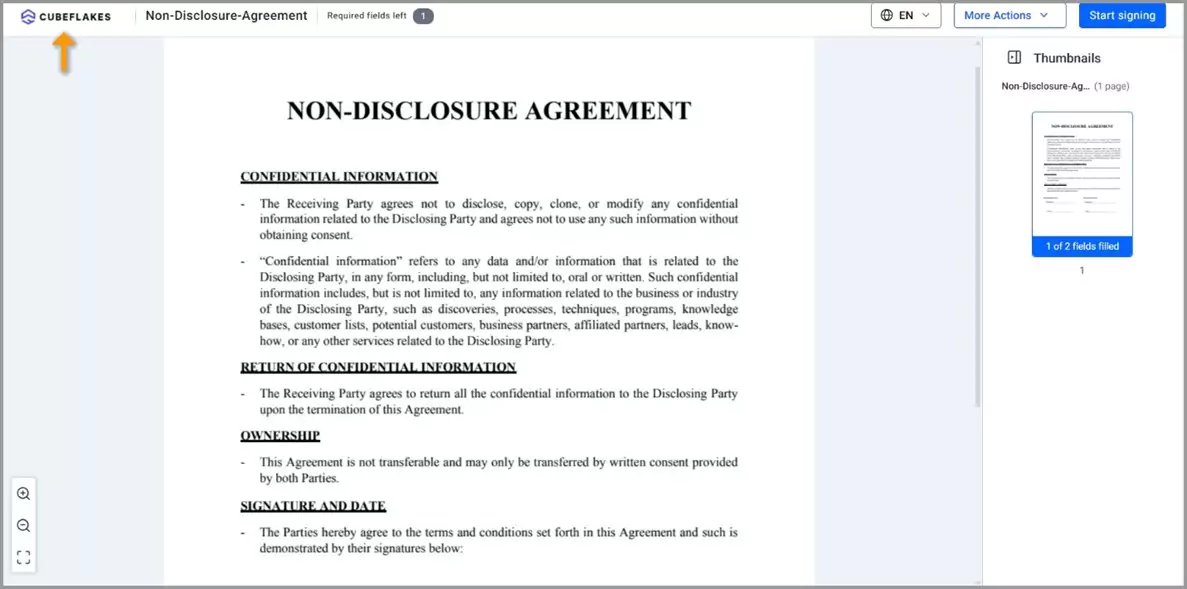
Logo and brand in the signing page
Audit trail document page
When downloading the audit trail documents, the branding logo, time zone, and custom legal terms will be displayed.

Customizing Options in Business Profile Page
Some signer-side customizations can be made on the business profile page. These options include:
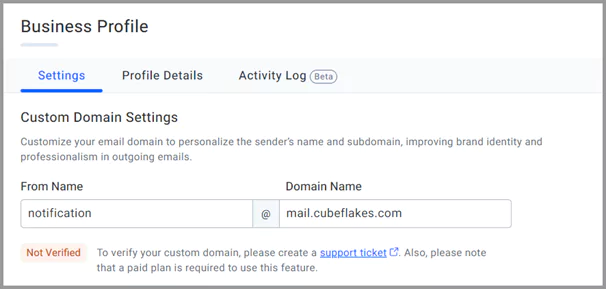
Configuring a Custom Email Domain
In the Business Profile section, you’ll find the setting option for custom domain settings. Customize your email domain to personalize the sender’s name and subdomain, elevating brand identity and professionalism in outgoing emails.
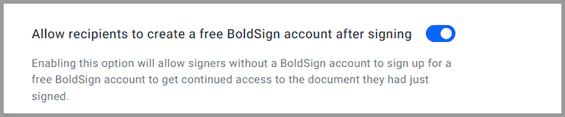
Enabling recipients to create a free BoldSign account after signing
When scrolling down in the Business Profile settings, enabling the ‘Allow recipients to create a free BoldSign account after signing’ option helps signers without a BoldSign account sign up for a free account, ensuring continued access to the document they just signed.
Allow recipients to create a BoldSign account after signing option
Conclusion
Thank you for taking the time to read this blog. I hope that I have provided you with sufficient information on creating and customizing brands in BoldSign.
If you haven’t yet, try BoldSign for yourself with a free trial—no need for a credit card. This way, you can see how it helps your workflow and makes eSigning easier for you and your clients.
Have any thoughts or questions? Drop them in the comments below. For more details or assistance, schedule a demo or reach out to our support team through our portal. BoldSign is here to make your document handling easy and efficient. Give it a shot and see the difference!
Comments
Post a Comment