OAuth vs. Sender Identities: Which One Should You Use?
What are Sender identities?
Sender identities let you send communications like emails or documents on behalf of another person using their name and email. This “on behalf” feature makes it appear as though the named sender initiated the action, which is ideal for authorized representation.
How it works:
- Register a user’s name and email as a sender identity.
- The user approves your request to act on their behalf.
- You send communication using their identity.
- The communication shows their details, but you control the process.
How are sender identities implemented in BoldSign?
In BoldSign, sender identities are set up through the web app or API, enabling you to send eSignature documents as someone else with their permission. It simplifies team workflows and client management, using their email as the sender, and they don’t need a BoldSign account. You can customize notifications and revoke access for security.
How to create sender identities in the BoldSign web app
1. Sign in to your BoldSign account using the web app.
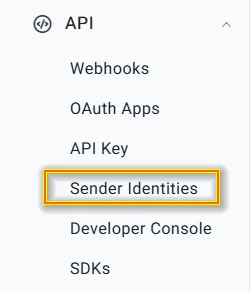
2. Go to API > Sender Identities.
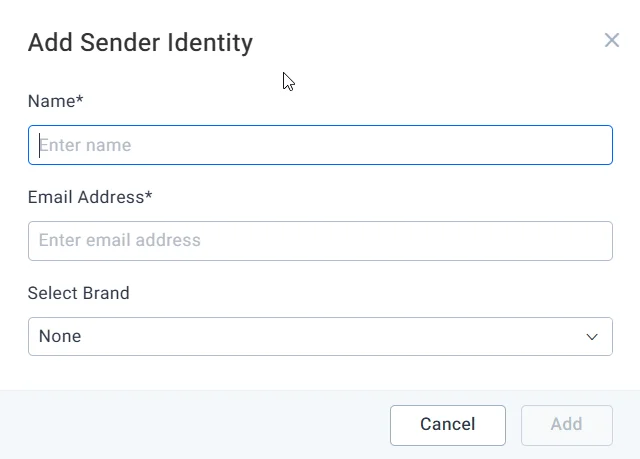
3. Enter the sender’s name and email.
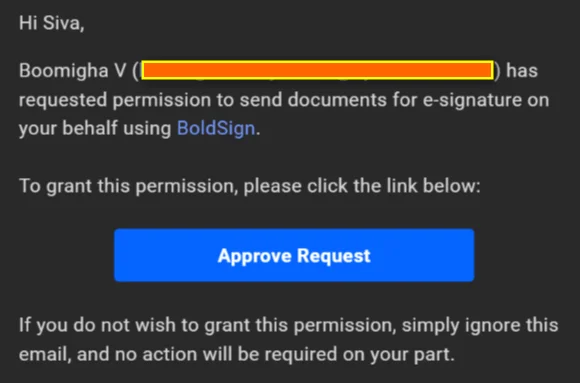
4. BoldSign emails the person a link to review and approve your request to send on their behalf.
5. Once they approve, you’re notified and can start sending documents under their name and email.
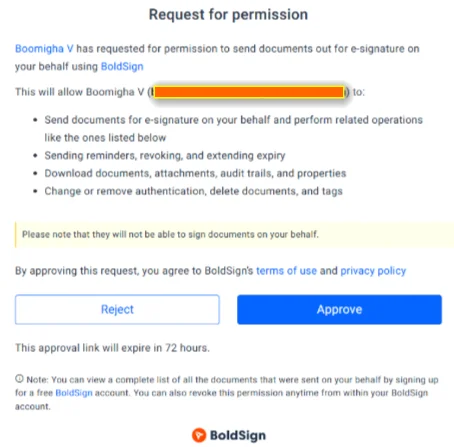
Notification after approval:
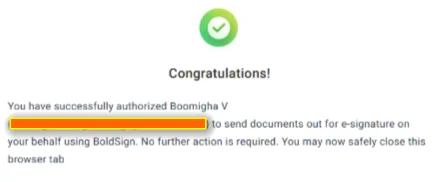
It’s simple, requiring just a few clicks, and easy for anyone to use—no tech skills needed.
How to create sender identities via the BoldSign API
Developers can use the BoldSign API to create sender identities, which is perfect for automating tasks in apps like CRMs or custom platforms. Just send a request with the sender’s name, email, and optional notification settings like alerts for document views or completion. To create a sender identity via the API:
- Use your API key to send a POST request with the sender’s details.
- The sender approves the request via email.
- Once approved, the identity is ready for use in your app.
curl -X 'POST' \
'https://api.boldsign.com/v1/senderIdentities/create' \
-H 'accept: */*' \
-H 'X-API-KEY: {your API key}' \
-H 'Content-Type: application/json' \
-d '{
  "name": "Luther Cooper",
  "email": "luthercooper@cubeflakes.com",
  "redirectUrl": "https://yourapp.com",
  "brandId": "{brandID}",
  "notificationSettings": {
    "viewed": true,
    "sent": false,
    "completed": true
  }
}'
Sending documents on behalf of others using sender identities
With an approved sender identity, you can send eSignature documents on behalf of someone else using their email. This is great for multi-user setups, like businesses managing client contracts. Simply add the sender’s email in the API’s “onBehalfOf” field when sending a document. It will appear to come from their email, but you’ll handle the process. The API supports both JSON and form-data formats for flexibility.
curl --location --request POST 'https://api.boldsign.com/v1/template/send?templateId=<template_ID>'
--header 'X-API-KEY: {your API key}'
--header 'Content-Type: application/json'
--data-raw '{
  "onBehalfOf": "luthercooper@cubeflakes.com"
}'
Please refer to this documentation for more details: Send a document on someone’s behalf. To learn more about using sender identities in the API, please refer to this blog.
A side-by-side comparison of OAuth and sender identities
| Aspect | OAuth | Sender identities |
|---|---|---|
| Purpose | Authenticate and authorize API access to BoldSign resources (e.g., documents, templates) | Delegate authority to send eSignature documents on behalf of another user or entity |
| Scope | Controls what API resources the app can access | Defines who can send documents using another person’s name and email |
| Set up | Needs technical setup with tokens and app IDs | Easy set up via web or API; no tech skills required |
| How it works | Uses tokens to authorize API calls after user login | Requires email approval from the person to send as them |
| Main use | Automates workflows for apps or integrations | Streamline document workflows for teams or assistants sending on behalf of others |
| Authentication | Token-based (Bearer tokens) with scopes like offline_access | Approval-based, no direct authentication for the delegate beyond initial setup |
| Security | Uses secure token and PKCE; refresh tokens reduce the need for repeated user logins | Owners can revoke access via email or web app (if they have an account in BoldSign) |
| Account needs | Requires a BoldSign account and license for each user | No BoldSign account needed for the person you send on behalf of |
Key takeaway: Use OAuth for secure, automated API access; choose sender identities for easy, account-free delegation of document sending.
When to use OAuth vs. Sender identities
| Aspect | OAuth | Sender identities |
|---|---|---|
| Use when |
|
|
| Use-case example | A company’s HR app uses OAuth to connect with BoldSign, automatically sending and tracking contracts for HR managers. | An assistant sends contracts as the CEO. After the CEO approves, the assistant uses sender identities to send documents that look like they’re from the CEO. |
Quick Tip: Choose OAuth for app integrations and automation; use sender identities to send documents as someone else with their permission.
Pros and cons of OAuth
Pros
- Secure: OAuth uses tokens for safe access, reducing password risks.
- Scalable: It’s great for big apps that connect to BoldSign like CRMs.
- Flexible: This option works for different app types with long-term access.
Cons
- Complex: You’ll need some technical know-how to set up and manage OAuth.
- Time-consuming: Initial setup takes effort, like configuring IDs and URLs.
- Maintenance: Tokens expire and need refreshing or reregistering, which can be tricky.
Pros and cons of sender identities
Pros
- Easy: Identities are simple to set up via web or API—no tech skills needed.
- Professional: Documents show the sender’s name and email.
- Trackable: Approvals and revocations keep actions clear and secure.
Cons
- Approval wait: Delays can occur if the sender doesn’t approve quickly.
- Oversight needed: You’ll have to monitor permissions to prevent misuse.
Quick tip: OAuth is best for tech-savvy users building automated apps, while sender identities are ideal for users with less technical know-how who need to send documents as someone else with approval.
Which is better: OAuth or sender identities in BoldSign?
OAuth is best when:
- You’re building an app like a CRM that automatically sends or manages documents in BoldSign.
- You need secure, long-term access to BoldSign features without repeated logins.
- You’ve got a technical setup.
We recommend you avoid OAuth if you just need to send documents manually or aren’t tech-savvy.
Sender identities are best when:
- You want to send documents as someone else (an assistant sending for a manager, for example).
- The sender’s email should appear on documents for branding.
- You need a simple setup for teams with clear approval records.
We recommend you avoid sender identities if waiting for sender approval is an issue or if you need advanced app features.
Quick tip: Pick OAuth for tech-heavy automation and sender identities for easy, team-based sending. If you’re unsure, sender identities are simpler for most users!
Conclusion
OAuth is perfect for developers automating BoldSign tasks via apps, while sender identities make it easy for anyone to send documents as someone else with approval. Choose what fits your needs and streamline your eSignature process with BoldSign! Try BoldSign today to start sending securely!



Comments
Post a Comment